BlogConstruction
Building a Deck That Lasts in the Wet Northwest
Permit, footings, ledger flashing, joist spacing for composite, gaps, water and guards: how a deck is built to last through Puget Sound winters.
Nov 20, 2026
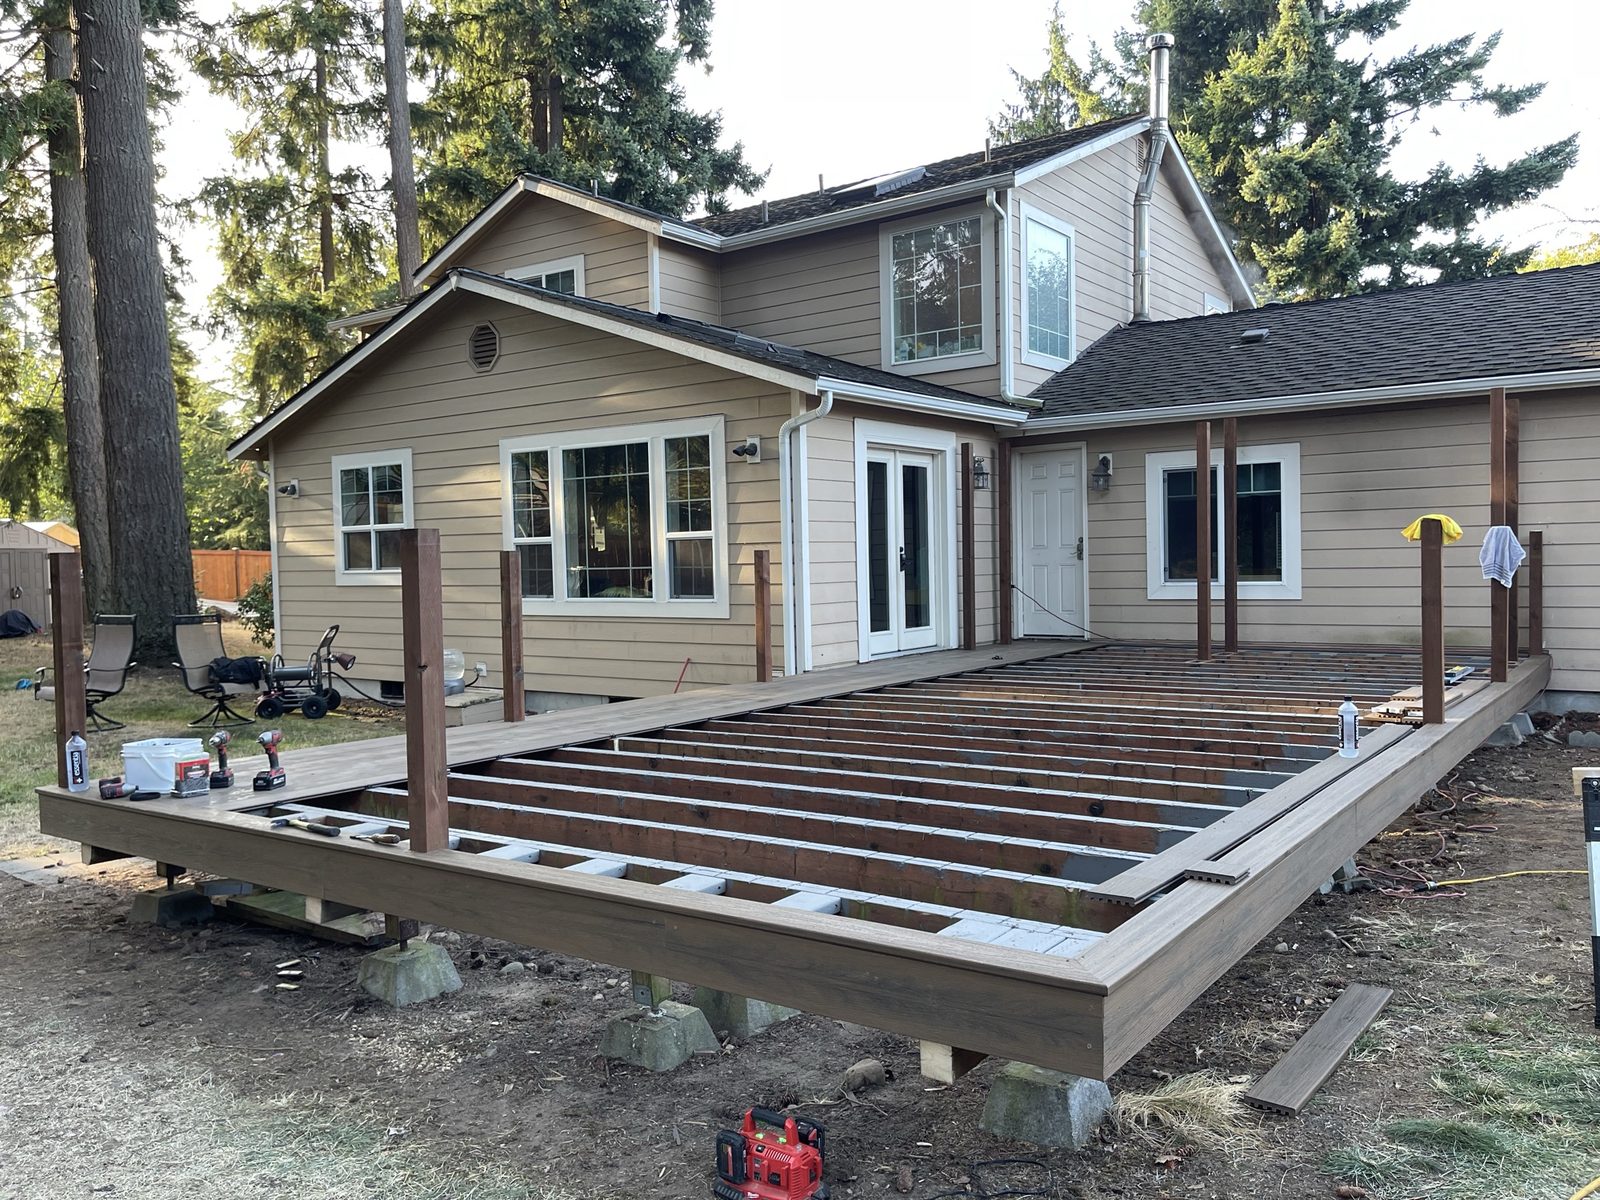
In the Puget Sound region a deck spends most of the year wet: rain from October into spring, moss on the north side, fir needles packed into the gaps. Composite boards handle that well. What fails is underneath and behind them: a ledger fixed to the house without flashing, a post standing in a puddle on its footing, joists spaced for thicker wood boards, a frame closed off so tightly that air never moves. This is the builder's view of a deck: the order of work and the details that decide whether it lasts.
The photos in this article come from one of the whole-house remodels our crews did on the Eastside, where we work in Kirkland, Bellevue and Redmond: the framing on its footings along the back of the house, composite boards going down, a post. LINKS also builds in Ukraine, where the same structure is usually a terrace on screw piles or concrete piers, often with WPC boards, and the rules about water and air are exactly the same.
When a deck needs a permit
The line is not the same everywhere. Seattle's Department of Construction and Inspections says a deck needs a permit if it is more than 18 inches above the ground, if it is a roof deck, or if it sits in an environmentally critical area such as a landslide-prone or flood-prone site. Most decks get a subject-to-field-inspection permit. A full addition or alteration permit is needed when the deck is more than 8 feet above the ground, has beams 14 feet or longer, has a solid surface with no gaps, or is larger than 750 square feet.
Bellevue draws the line at 30 inches: no permit for a deck less than 30 inches above the ground, a permit with plan review where the highest walking surface is higher, and a permit for repairs to existing deck or porch handrails and stairs. Kirkland, Redmond and unincorporated King County publish their own rules, so the page of the jurisdiction for the actual address is read before anything is drawn.
One number matters for the structure. Seattle requires a minimum design live load of 60 pounds per square foot. The American Wood Council's prescriptive deck guide, DCA 6, which many builders use as a reference, is built on 40 psf. In Seattle its tables do not replace a design checked against the city's own load.
Footings and posts
DCA 6 puts the bottom of every footing on undisturbed soil at least 12 inches below the undisturbed ground surface or below the frost line, whichever is deeper, and has the building official verify bearing before concrete is placed. Where the soil is likely to carry less than 1,500 psf, a soils investigation decides. Call 811 before digging: footings never go over septic systems, utility lines or meters.
The rule most often missed applies right next to the house. Deck footings closer than 5 feet to an exterior foundation wall must bear at the same elevation as the house footing. The soil against a foundation wall was dug out and pushed back, and a shallow footing in that backfill keeps settling. On a house with a basement that can mean a deep pier, which belongs in the drawings and the estimate, not in a conversation on site.
Posts in DCA 6 are 6x6 at minimum, centered on their footings. The beam sits in a notch cut into the post or in an approved post cap; a beam bolted only to the side of a post is prohibited. Corner posts taller than 2 feet get diagonal bracing. A metal post base keeps the end grain off the concrete so it can dry, and Seattle requires treated or naturally decay-resistant wood wherever wood touches concrete close to the earth. Cut ends and notches are field-treated with a preservative such as copper naphthenate. How soil and water decide a foundation in general, we covered in How to Choose a House Foundation.
The ledger: where decks fail
An attached deck hangs one side on the house through a ledger board. It is the connection where trouble most often starts: water gets behind it and rots the house framing quietly for years, and a poorly fastened ledger can pull away from the house under load. Both are invisible once the boards are on.
- Siding comes off first. DCA 6 requires the siding or exterior finish to be removed before the ledger goes on. A ledger bolted over siding traps water behind it.
- Flashing laps like shingles. The water-resistive barrier above laps over the flashing, the flashing laps over the ledger and ends in a drip edge, so water always runs over the next layer, never behind it. DCA 6 calls for corrosion-resistant metal at least 0.019 inch thick or an approved non-metal, and warns against aluminum in contact with lumber treated with copper preservatives such as ACQ or copper azole.
- Bolts or lags, not nails. The ledger is at least a nominal 2x8, fastened to the band joist with 1/2-inch lag screws or bolts with washers, at the spacing the tables give for the joist span. Lead anchors are prohibited.
- Know what you are bolting into. Ledgers may not attach to brick or stone veneer, hollow masonry, cantilevered floor overhangs or bay windows. Some older houses have band boards thinner than 1 inch, and truss floors may have only a 2x4 ribbon at their ends. Then the deck stands on its own posts, or it gets an engineered detail.
- The lateral connection. Seattle states that the ledger must be connected so that it will not pull away during an earthquake, and points to the prescriptive connection in section R507.9.1.3 of its residential code, or to an engineer. DCA 6 shows hold-down tension devices in at least two places within 2 feet of the deck edges, each rated at no less than 1,500 pounds.
The door threshold is part of the same detail. DCA 6 allows the deck surface to sit no more than 1 1/2 inches below the threshold where the door swings out over the deck, and up to 7 3/4 inches where it does not; the threshold itself is flashed and sealed against splash. The flashing has to be photographed before it disappears, as described in Hidden Work: Record It Before Cover.
Framing for composite boards
Composite boards are less stiff than lumber of the same size, so they need joists closer together. Trex's installation guide gives 16 inches on center for its 1-inch boards on residential decks and 24 inches for its 2x6 boards. Laid at an angle, a board spans less: at 45 degrees the spacing drops by 4 inches, at 30 degrees it is half the chart value. Every board must span at least three joists. Other manufacturers publish their own tables; the guide for the board actually bought is the one that counts.
What composite does not forgive is an uneven frame. A crowned joist, a low spot at a hanger, a sagging beam: all of it shows through the boards. Trex says plainly that joists must be level and plumb. On site that means setting joists crown up, checking the plane with a string line before the first board, and planing or shimming the tops where they disagree. Picture-frame borders, board seams and stair nosings need blocking, planned before the decking arrives.
The top of the frame is where water sits: every screw hole and every gap drips onto the joist below. Trex recommends joist and beam tape on the top of joists, rim joists and ledger boards to help prevent rot. Once the boards are down, there is no way back to it.
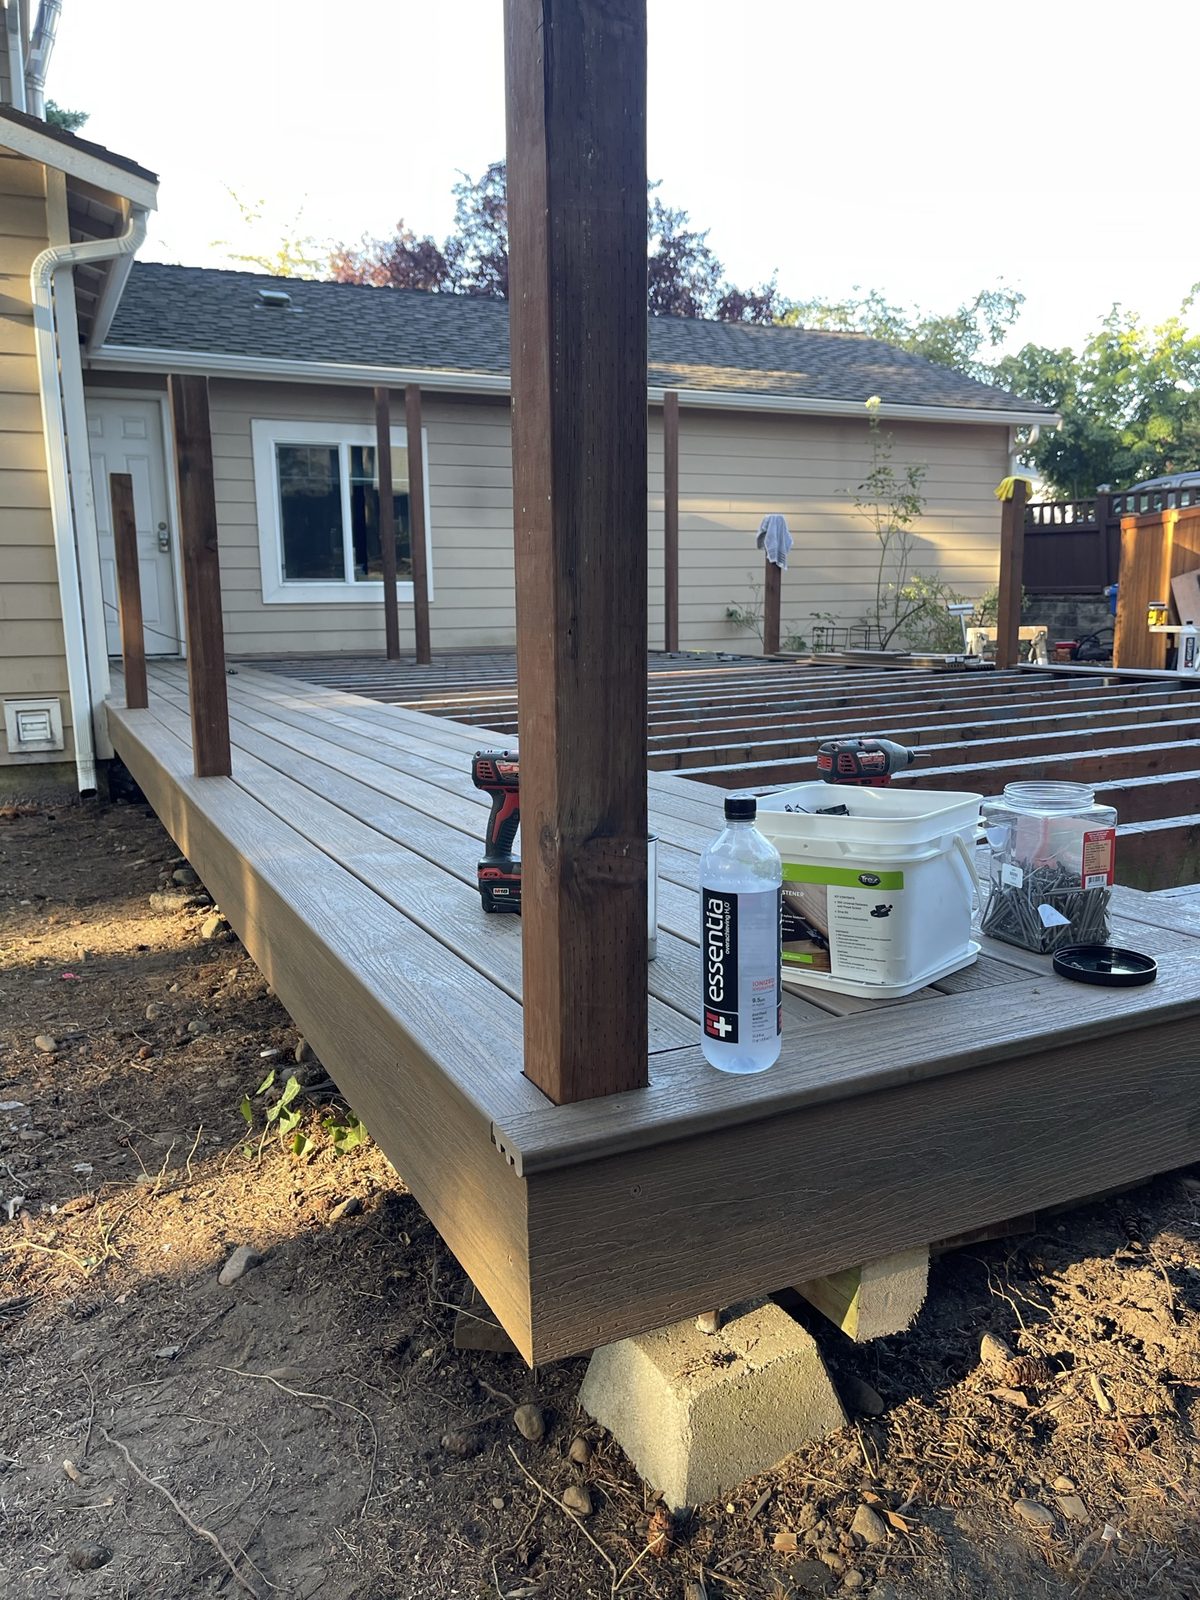
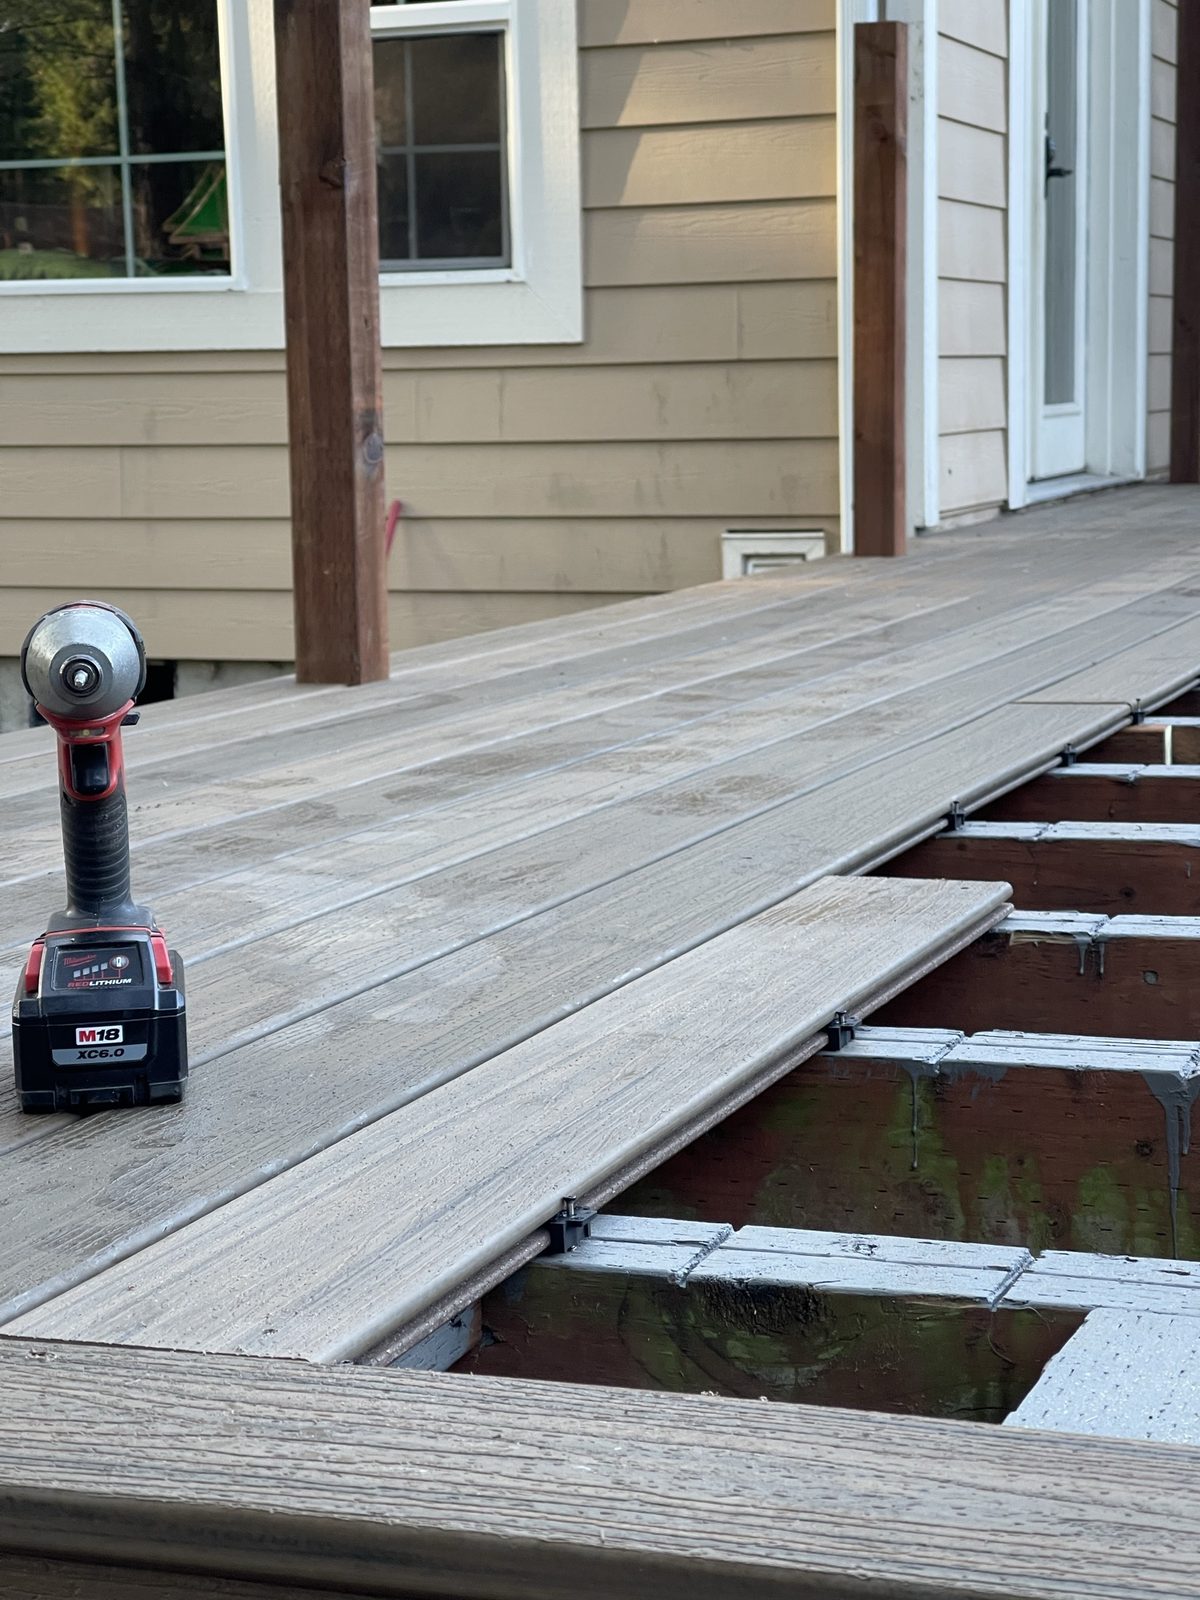
In these photos from one of our Eastside remodels, the framing stands on its footings along the back of the house before the composite decking follows.
Hidden fasteners and gaps
Composite moves with temperature, mostly along its length, and the wood frame shrinks as it dries. Gaps take up both movements and let water through. Trex's guide sets the numbers for its boards:
- a width-to-width gap of at least 3/16 inch in any weather; 3/8 inch in heavily wooded areas, where needles would pack the gaps; never more than 1/2 inch;
- an end-to-end gap set by the temperature on installation day: 1/8 inch above 40°F, 3/16 inch below;
- 1/4 to 1/2 inch where a board meets a wall or a post, again by temperature;
- an overhang beyond the rim of no more than 3/4 inch, and factory ends trimmed by at least 3/16 inch.
Around Seattle the 40°F line is crossed for months, so butt joints gapped the same way in December and July end up open in summer or pushing against each other.
Hidden fasteners clip into the grooved board edges and leave the surface free of screw heads. Their real job is spacing: with the recommended clips, the clip sets the gap. Boards are fastened at every joist, and butt joints get support under both ends. Face screws remain at the first and last boards, and they should be the screws the guide names. All metal in contact with treated lumber must resist corrosion: DCA 6 requires hot-dip galvanized, stainless, silicon bronze or copper fasteners, and stainless steel 304 or 316 within 300 feet of salt water, which covers many waterfront houses on Puget Sound.
Water, air and the wood underneath
A deck stays sound as long as it can dry. Trex's guide puts it simply: all decks require air circulation, so leave openings under the decking or widen the gaps to 3/8 inch. Low decks carry the risk: skirting tight to the ground, a frame inches above wet soil, needles piled in the joist bays, no way to clear them.
- Slope. A slight fall away from the house sends surface water off the building. It goes into the framing, through the height of beams and ledger, not into shims under the boards.
- Ground under the deck. The soil slopes away from the foundation, gets a weed barrier and gravel, and never touches the rim or the posts. Downspouts discharge to the drainage system, not under the deck.
Pressure-treated lumber is sold by use category, printed on the end tag. The American Wood Protection Association lists UC3B for uncoated wood above ground; UC4A, ground contact general use, for posts and ledgers; and UC4B, heavy duty, for permanent wood foundations and other severe exposures. Its note adds that joists and beams that are difficult to replace and critical to the structure may need ground-contact treatment even above ground. Under a deck that stays wet half the year, that is exactly the case, so the tag on every lift is worth reading before the first cut.
Guardrails and stairs
Seattle requires a guard where the deck is more than 30 inches above adjacent surfaces, the ground or a lower roof. The guard is at least 36 inches tall, and its openings may not pass a 4-inch sphere.
The height is the easy part. As DCA 6 explains, the residential code requires guards to resist a 200-pound concentrated load in any direction. The weak point is the post at the rim: a 4x4 bolted to the outside of a joist rocks unless the joist is tied back into the frame. DCA 6 details it with hold-down hardware rated at least 1,800 pounds for a 36-inch guard, and measures guard height from any fixed bench next to the rail, because people stand on benches.
Stairs in Seattle: risers no more than 7 3/4 inches, treads at least 10 inches, width at least 36 inches. Four or more risers need a handrail 34 to 38 inches above the nosings. Risers should match from top to bottom; an odd last step, usually from guessing the landing height before the pad is poured, is where people trip. DCA 6 makes stringers at least 2x12 with the foot of the stair on its own footing, and composite treads need stringers closer together than the deck joists, usually 12 inches on center or less.
Questions we hear about decks
Does a low deck need a permit? In Seattle, not at 18 inches or less unless it is a roof deck or in an environmentally critical area; in Bellevue, not below 30 inches. Other cities set their own line.
Can composite boards go onto an old wood frame? Only if the frame is sound and its joist spacing meets the table for the new boards. Resurfacing is also the cheapest moment to open the ledger and look for rot behind it.
Is joist tape necessary? Trex recommends it on joists, rims and ledgers. In a wet climate it is one of the cheapest ways to protect the frame, and it only goes on before the boards.
How a terrace is planned into the house and the site, from the slope of the lot to the choice of decking, DeZZign covers in Terraces; what a pergola adds above it, in What Is a Pergola?
How LINKS builds a deck
We build from DeZZign's design, the client's own drawings or a set we prepare, and price the estimate from those drawings before work starts: footings, framing lumber by grade and treatment, connectors, flashing, boards, fasteners and railings, line by line (how to read one: How to Read a Builder's Bid). Materials are procured on a schedule tied to the stages, so the boards arrive when the frame has been checked, not weeks earlier to sit in the rain.
The footings, the ledger flashing, the lateral connection and the top of the frame are photographed and recorded before the boards cover them. The site is kept clean, and acceptance is signed only after every item on the punch list is fixed. We build in the Seattle area and in Ukraine.
Sources: City of Seattle, SDCI: Decks; City of Bellevue: Work Requiring Permits; American Wood Council: DCA 6, Prescriptive Residential Wood Deck Construction Guide; Trex: 2024 Decking Installation Guide; American Wood Protection Association: Use Categories for Residential Construction.