BlogConstruction
Built-In Shelving Walls: Site-Built vs Factory
A floor-to-ceiling library wall built on site vs factory casework: walls and floors, blocking, shelf sag, pins, wiring, the rolling ladder and paint.
Nov 20, 2026
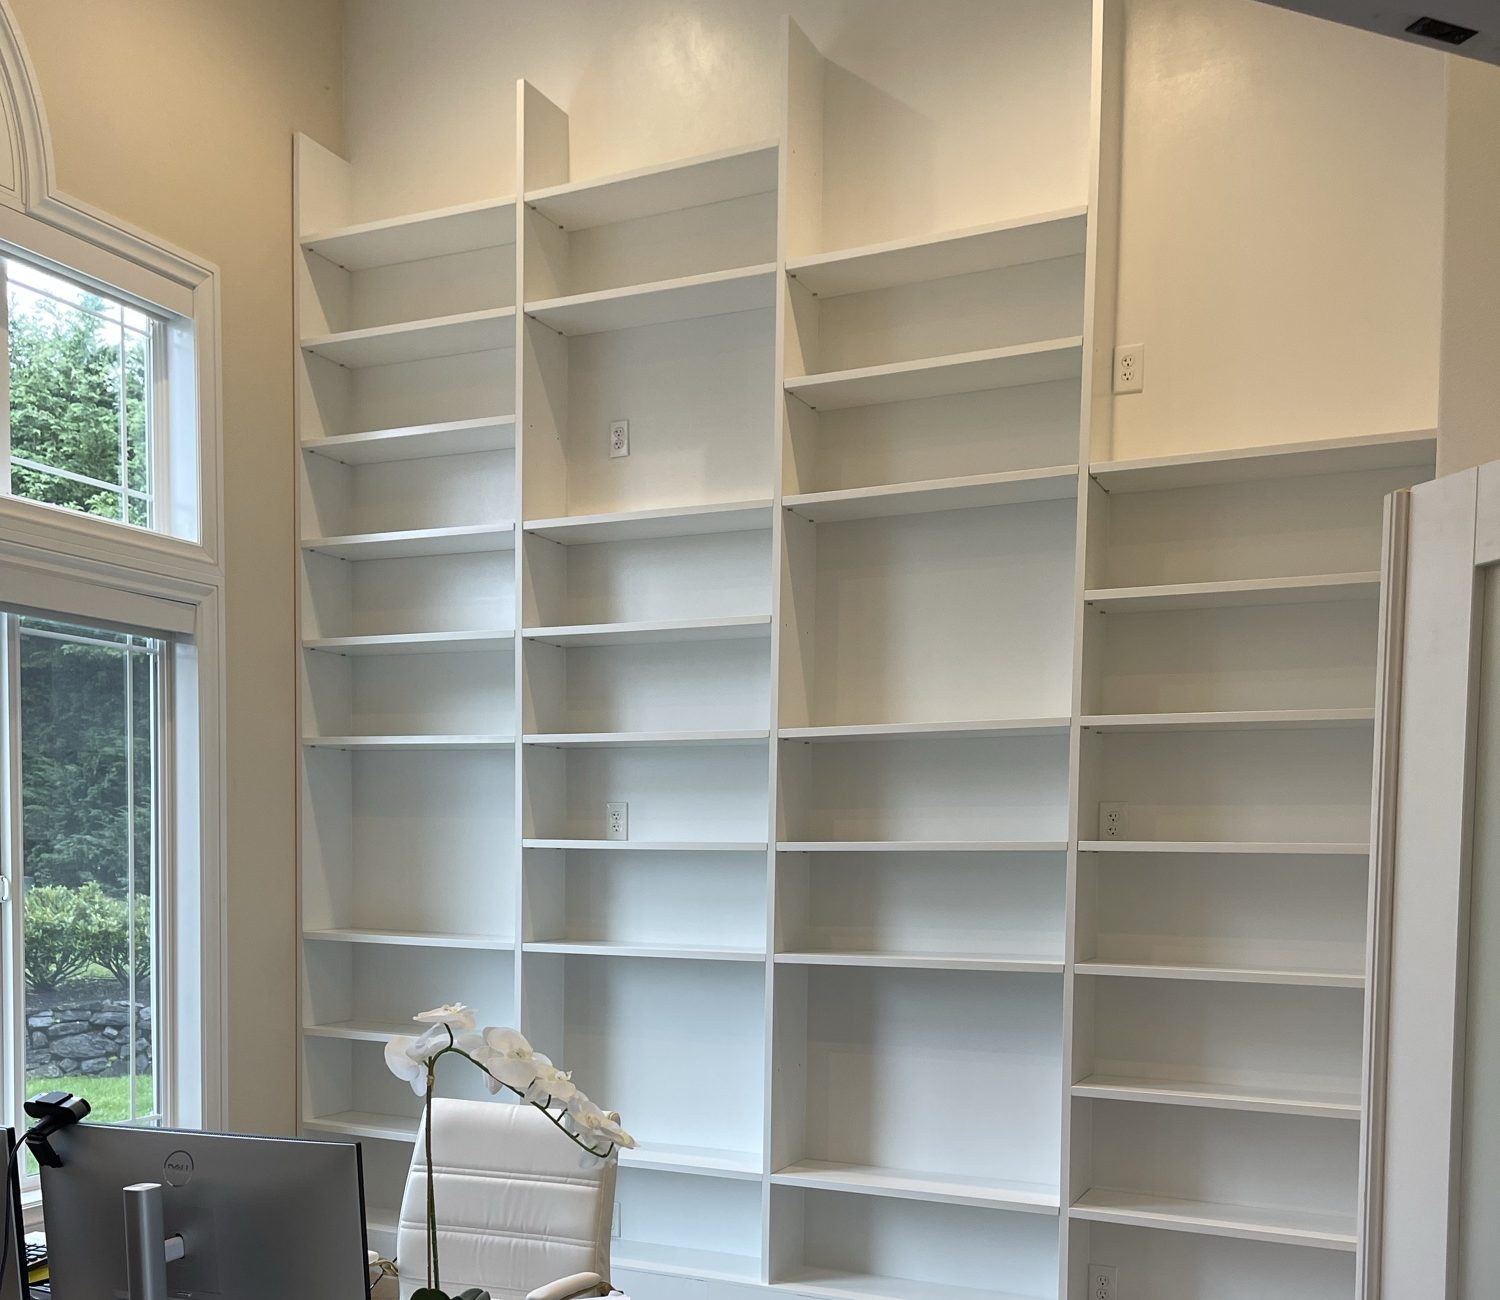
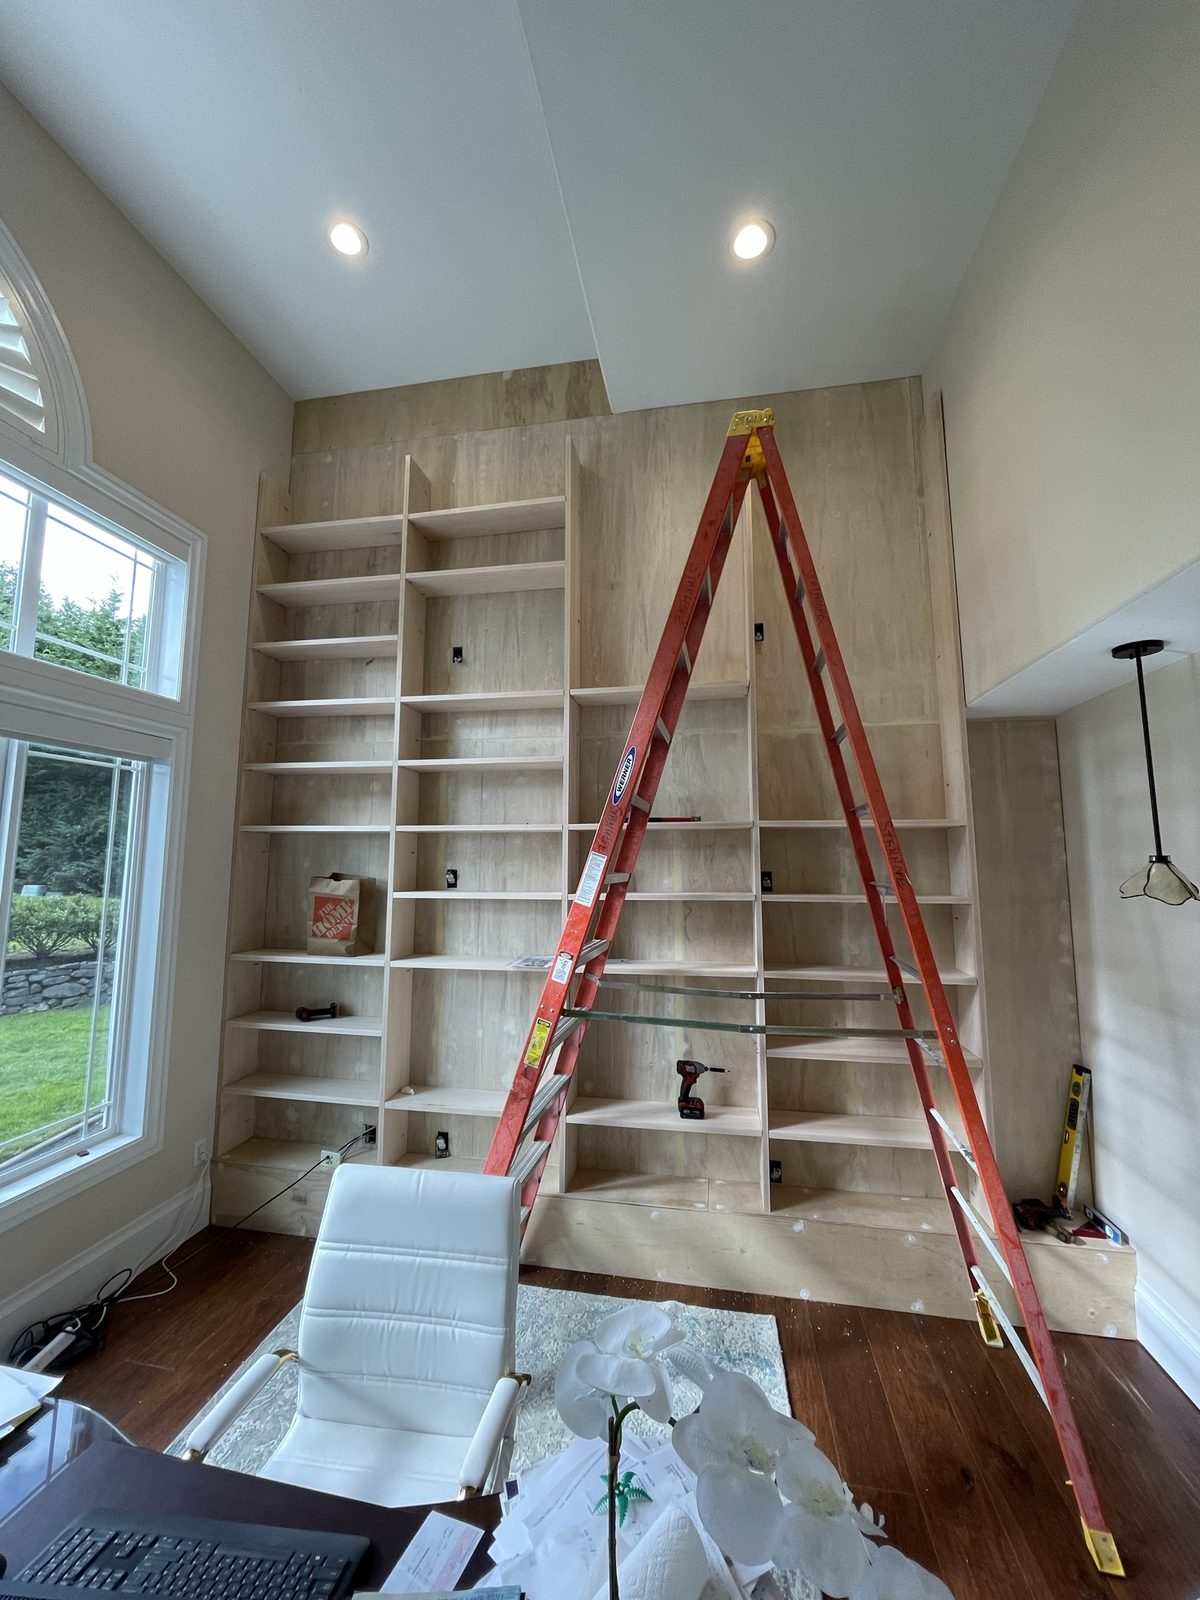
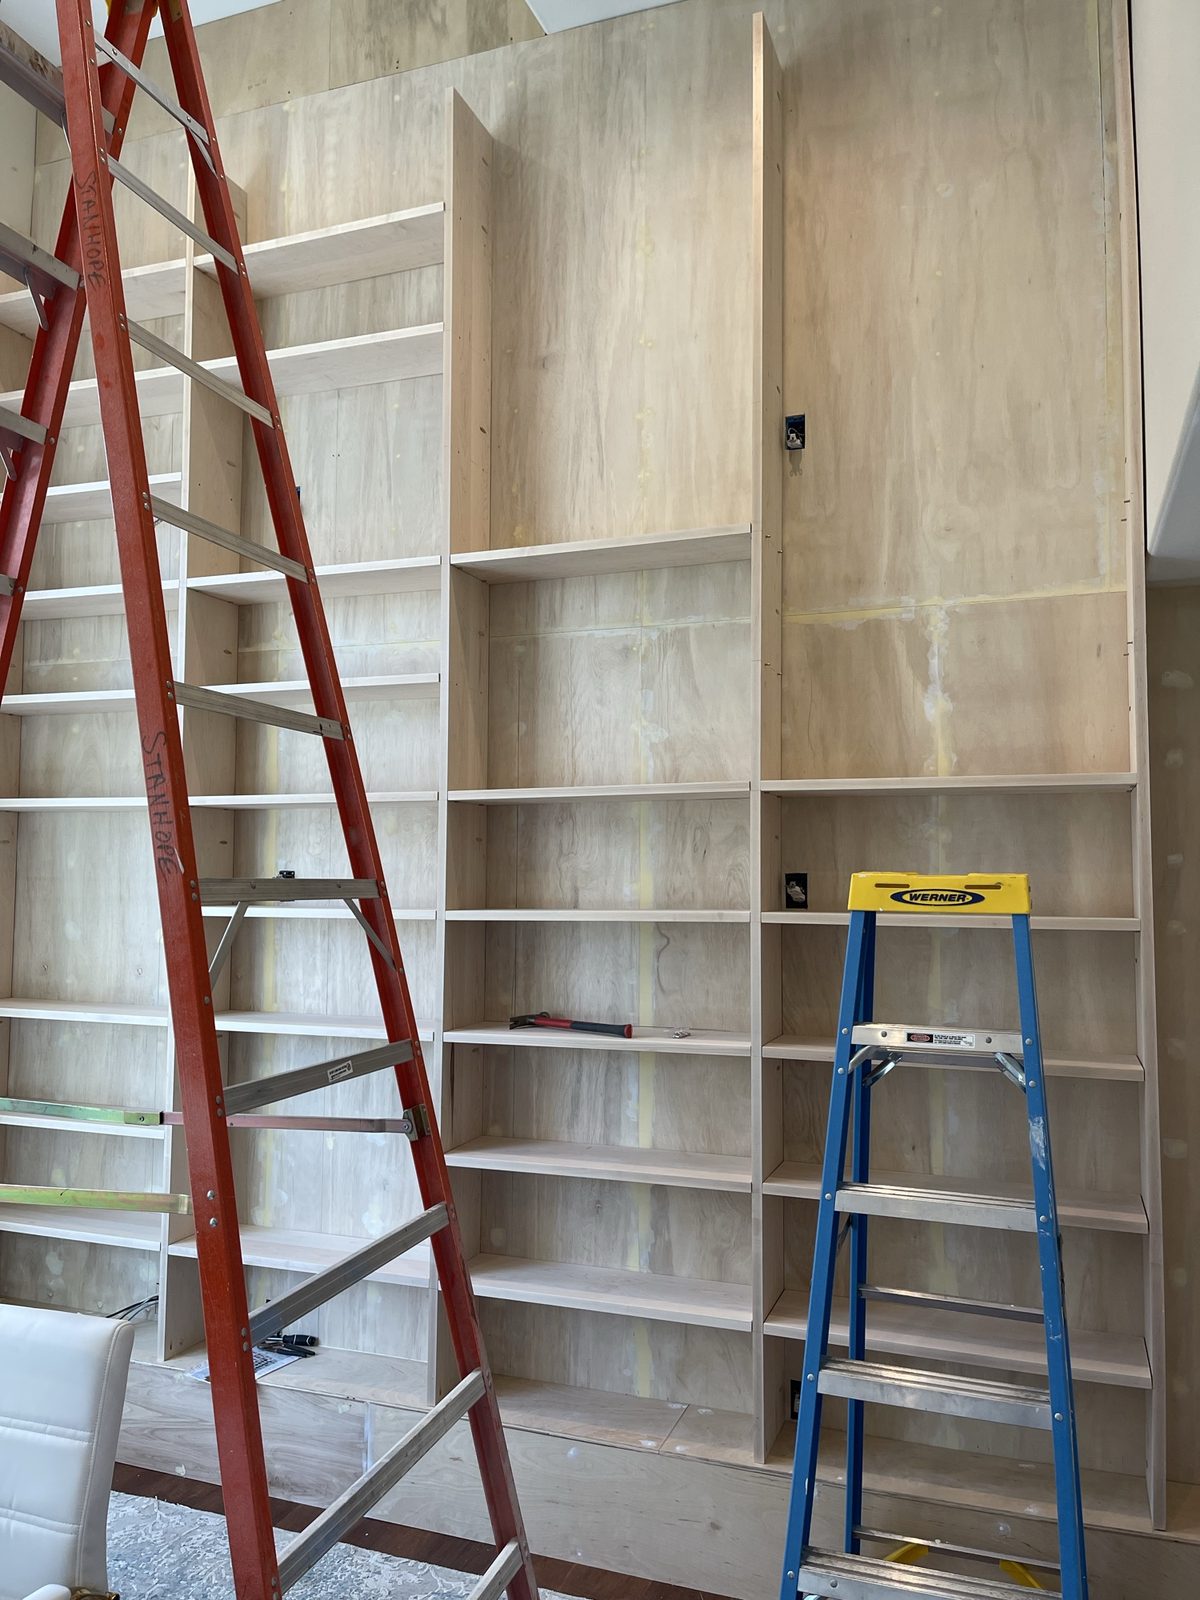
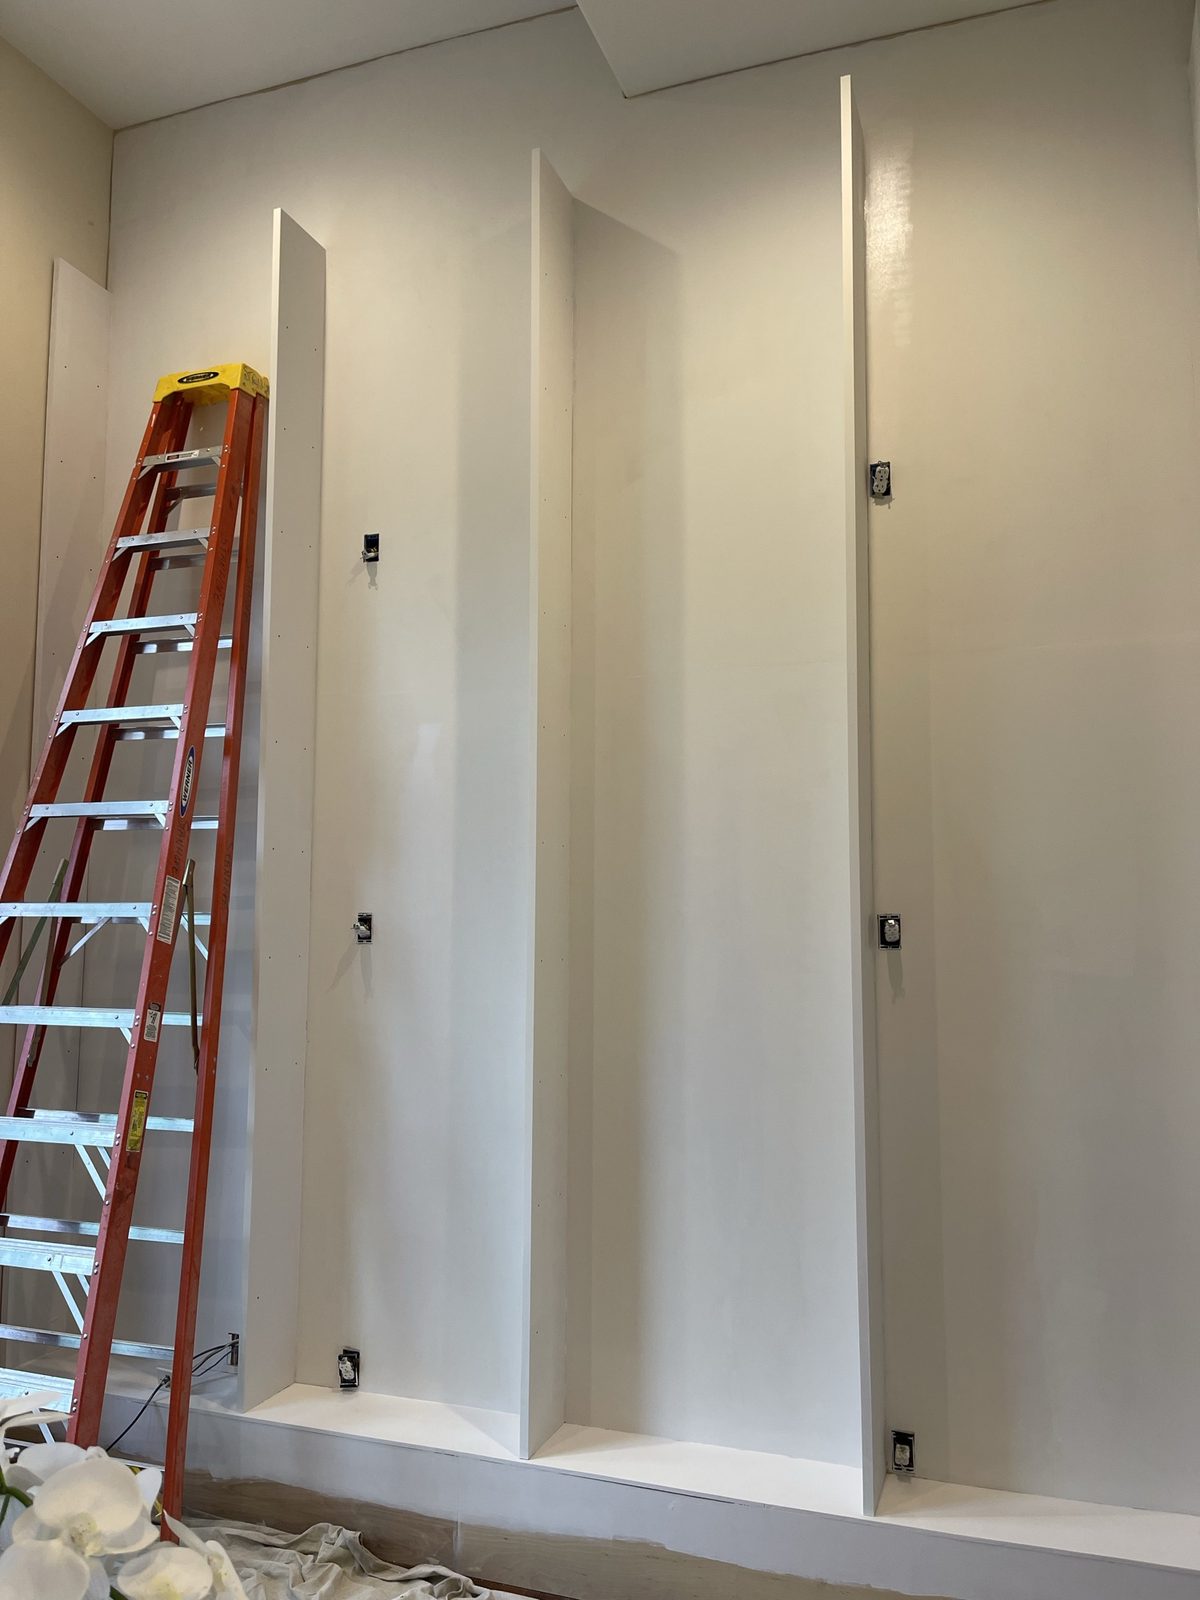
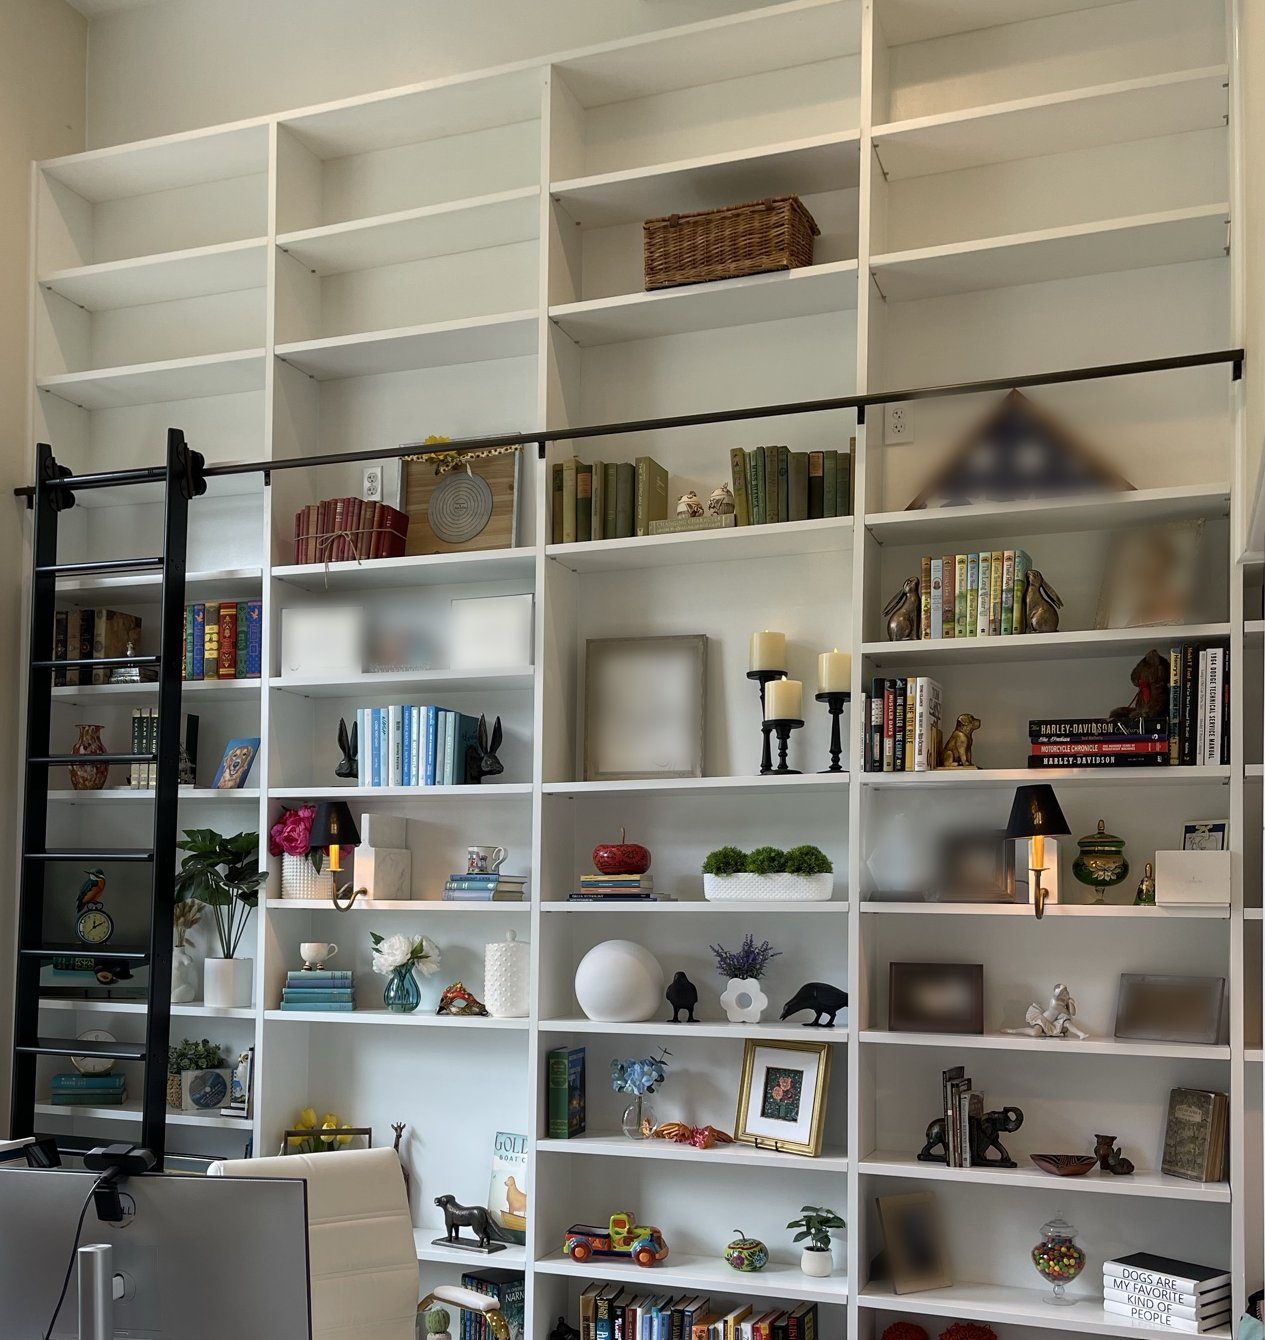
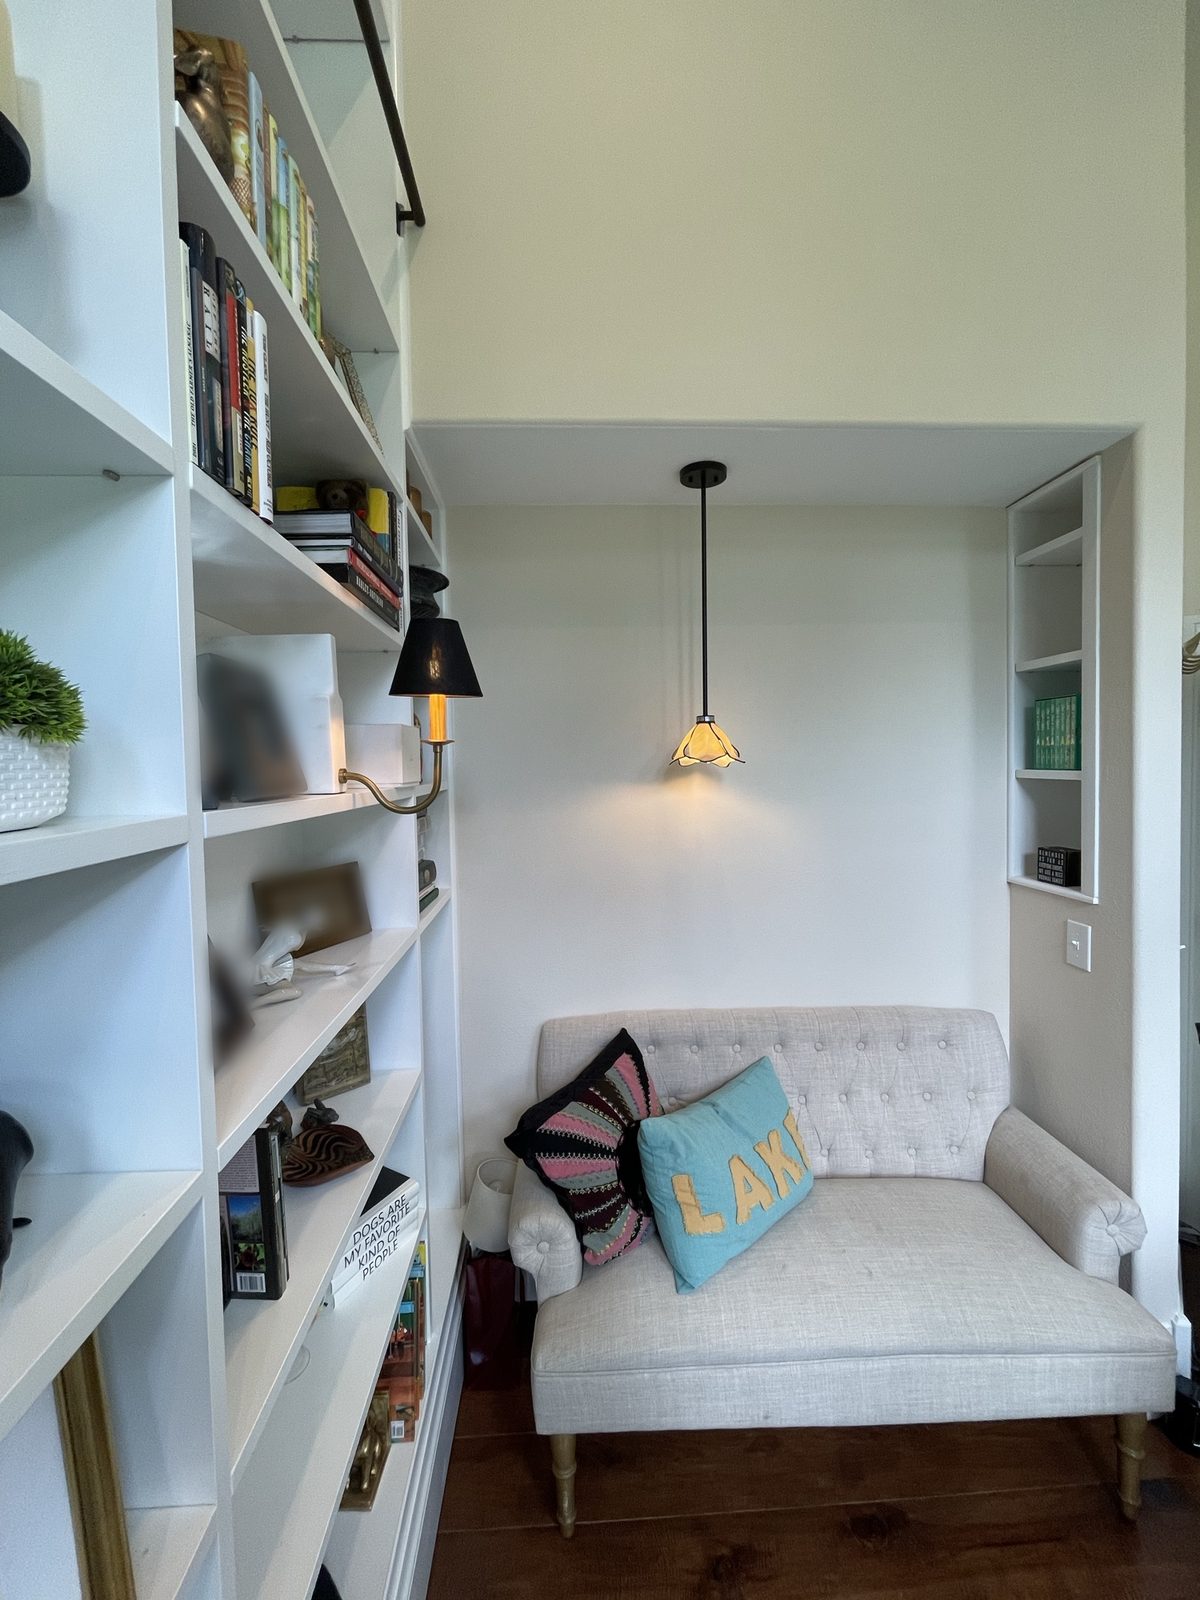
A wall of books from floor to ceiling looks like furniture. For the people who build it, it is closer to a small structure: it is fixed to the house, each section carries hundreds of pounds, it hides wiring and lighting, and in a double-height room people climb it. The photos below come from a whole-house remodel our crews did on the Eastside (Kirkland, Bellevue and Redmond). They show one home office in three stages: bare plywood carcasses and framing on the wall with ladders in front, the same wall primed and painted white, and the finished room with a rolling library ladder. Here is how a wall like that is built on site, and when factory cabinetry is the better call.
Site-built or factory casework: where each wins
Factory casework is made in a shop. Panels are cut on a CNC router or a panel saw, edges are banded by machine, shelf pin holes are bored in exact rows, and the finish is often sprayed in a booth. The boxes arrive ready and go in fast. For kitchens, closets, laundry rooms and runs of standard height, where repeatable boxes and a hard finish matter more than fitting one wall, that is hard to beat.
A factory box is limited by the truck, the stairs and the room. It has to pass through the front door and turn on the landing, so a tall wall is split into stacked units. Every room is slightly out of square, so gaps at the walls and ceiling are closed with fillers and scribe strips; the standard cabinet designs in the first edition of the Architectural Woodwork Standards (AWS, 2009) assume scribes no wider than 1-1/2 inches. Painted joints between stacked boxes often open into hairlines as the house moves with the seasons.
A site-built wall is assembled in the room. The carcasses stand on a continuous base, face frames and trim run across the joints, crown and baseboard continue the room's own profiles, and everything is painted in place. The wall reads as architecture rather than a row of cabinets, and it fits the room exactly, out-of-plumb corner included. The price is more days on site, dust and finishing inside the house, and a result that depends on the crew's hands.
Many walls are hybrids: shop-made lower cabinets, site-built shelving above, and face frames, crown and paint applied on site over all of it.
The wall and the floor come first
No wall is perfectly plumb and no floor perfectly level, and a floor-to-ceiling wall shows both errors. Before anything goes up, the whole run is checked with a laser level: the floor along the wall, the plane of the wall, both corners and the ceiling line. In a double-height room that takes scaffolding or tall ladders, as in our photos.
The AWS industry practices give a yardstick: walls, ceilings and openings more than 1/4 inch out of plumb, level, flat or straight in 144 inches (12 feet), or floors more than 1/2 inch out, are not acceptable for installing architectural woodwork, and the installer is not expected to scribe beyond that. Shimming a cabinet toe base up to 1/2 inch is accepted; larger floor variations are corrected before the cabinets go in. In a remodel, straighten the wall and floor first or design the built-in to absorb the error.
- A level base. A base frame is set along the wall, shimmed to level at every support and fixed down. The carcasses stand on it, so the floor's slope hides behind the baseboard instead of showing in the shelf lines.
- Scribing. End panels and scribe strips are cut to the real shape of the wall and ceiling, so the gap closes without a fat bead of caulk. A floor-to-ceiling wall needs a scribe at the top as well as at the sides.
- Fixing. Each carcass is screwed to studs and blocking through solid rails at the top and bottom of its back. Unfixed, a tall loaded bookcase can tip, and a rolling ladder pushes on it daily.
- Blocking before drywall. Horizontal blocking between the studs, wherever the carcasses, top rail, ladder rail or a wall-hung desk will fasten, goes in while the wall is open. The AWS treats blocking and backing as the builder's work, not the woodworker's, so it has to be on the drawings. Then it is photographed with a tape in the frame, as we describe in Hidden Work: Record It Before Cover.
Materials and shelf sag
- Plywood is stiff for its weight, holds screws well, even near an edge, and copes with humidity changes. It is the usual choice for carcasses and long shelves. Under paint its face can show grain and its edges show plies, so painted work gets a hardwood edge or filled edges.
- MDF is flat, stable and takes paint better than anything else, which is why doors, panels and applied mouldings are often MDF. It is heavy, holds screws poorly in its edges, swells if water gets in, and sags more than plywood of the same thickness.
- Particleboard, usually melamine-faced, is the economical core of much factory casework and the weakest of the three for long, loaded shelves.
Shelf sag is where library walls fail in plain sight. The AWS sets design loads of 50 pounds per square foot for library and book shelving and 40 for other shelving, no more than 200 pounds on any one shelf, and takes L/144 as the maximum acceptable deflection: a quarter of an inch on a 36-inch shelf. It does not count creep, the extra sag that builds up over time, as a defect. The Sagulator, the free shelf calculator on Woodbin, notes that the eye picks up about 1/32 inch of sag per running foot, recommends aiming for 0.02 inch per foot or less, warns that wood shelves sag about 50 percent more over time, and puts a fully loaded bookshelf at 20 to 40 pounds per running foot.
Span matters most: under an even load, deflection grows roughly with the fourth power of the span, so a shelf twice as long sags about sixteen times as much. Thickness is next: deflection falls with the cube of thickness, so going from 3/4 to 1-1/2 inches cuts it to about an eighth. Material is third. The practical tools are short spans, a solid hardwood strip glued to the front of each shelf (an edge an inch or more deep works like a small beam, while thin edge banding adds almost nothing), and fixed shelves where the load is heaviest. A face frame stiffens the carcass, but it helps an adjustable shelf only if the shelf actually bears on it. Put your real span, depth, material and load into the calculator before any shelf is cut.
Shelf pins or fixed shelves
Fixed shelves, dadoed or screwed into the sides, become part of the structure: they keep tall sides from bowing, hold the carcass square, and sag less because their ends are held. Adjustable shelves on pins give freedom at the cost of more sag. A good library wall mixes the two: a fixed shelf every few feet of height, often on one line across the whole wall, carries the structure and the rhythm, and adjustable shelves between them take books of different heights. In a shop the pin holes are line-bored on 32 mm centres; on site they are drilled with a jig from the same reference edge on every side, or the shelves rock. Metal pins or sleeves outlast plain plastic. Keep paint out of the holes or clean them afterwards: a hole half full of paint will not take a pin.
Lighting and outlets before the wall closes
Every wire behind a built-in is decided while the wall is open, because the carcass covers the wall and paint covers the carcass. Lighting first: LED strips in the shelf fronts or uprights, picture lights, downlights in the top soffit, a lit desk niche. Each needs a cable route, a reachable, ventilated place for its driver, and a sensible switch.
Then power: outlets at the desk, in the base cabinets for chargers and a printer, perhaps one inside a cabinet for the router, plus data and low-voltage runs. Nothing should stick out where the ladder rolls or where its feet land. Boxes are set to the carcass layout, so the casework drawings must exist before the electrician arrives. The rough-in is inspected under the permit before the walls close and every position is photographed. More on the sequence in The Right Order of a Remodel.
The rolling ladder
The ladder shapes more of the wall than people expect. The figures below come from one manufacturer's published document, the Quiet Glide ladder installation and specification guide,. Other makers publish their own numbers, and the ladder you buy sets the final ones.
- The rail height sets the ladder. The guide lists rail heights, from the floor to the centre of the rail, of 91 inches for its 8-foot ladder, 103 for the 9-foot and 115 for the 10-foot. A taller wall needs a custom ladder or a second rail level, so the rail height is fixed in the drawings.
- The angle and the floor. The bottom of the ladder is cut at 12 degrees, and in the climbing position its foot stands about 19.35, 20.5 and 21.7 inches from the wall for the three heights. That strip of floor along the whole wall must stay clear and flat: no thick rug edge, no floor outlet, no parked desk chair.
- Clearances. At least 7 inches from the rail centre to the ceiling, crown or any overhang with the ladder stored, and at least 3 inches from the rail centre to upper cabinet doors in the climbing position if those doors must open.
- Brackets. About 32 inches apart, never mounted on drywall, always into solid wood. On a built-in that means a continuous solid rail or a fixed shelf at the rail line, tied back to studs and blocking.
The guide gives no weight rating, so ask for one in writing for your model, and use the ladder one person at a time. A climber's weight goes through the rail and brackets into the carcass and on into the wall, one more reason to fix the carcasses to blocking at rail height.
Painting on site and handover
A site-built wall is finished in place, and paint shows every shortcut. Nail holes are filled, joints that will move are caulked, then everything gets a thorough final sanding. The AWS asks the same before jobsite finishing: handling marks and moisture effects sanded off every exposed surface, then cleaning before sealer or finish.
A cut MDF edge is porous: it soaks up primer, its fibres stand up, and under the topcoat it looks rough beside the smooth face. The usual fix is to seal the edges, sand them and prime again, or fill them before priming, until every edge looks like the face.
Spraying gives the smoothest, most factory-like finish and reaches the inside corners of every opening, but it means emptying or masking the room and containing overspray. Brushing and rolling a self-levelling enamel is slower and leaves a little texture.
Then the paint needs time. As an example, the data sheet for Benjamin Moore Advance, a waterborne alkyd recommended for trim and cabinets, gives 4 to 6 hours to touch and 16 hours to recoat at 77 °F and 50 percent humidity, says not to return shelves to service for at least 5 to 7 days, notes that full hardness can take up to 30 days, and says not to apply it below 50 °F. Cool, damp weather stretches all of it. Books on fresh paint stick, so the owner should know the date the shelves can take a load.
At handover the wall is walked with the client: shelf lines level, scribes tight, doors adjusted, pin holes clean, lights and outlets working, the ladder rolling the full length without binding. Every remark goes on the punch list. Photos of the blocking and wiring go to the client with the drawings.
In Ukraine the same wall usually stands against aerated concrete, brick or concrete instead of wood studs, so the fixing changes: dedicated anchors for aerated concrete, long plugs drilled without hammer action in hollow brick, and backing built into drywall partitions before they close. LINKS builds there too, from the same kind of drawings.
Questions about built-in library walls
Is a site-built wall more expensive than factory cabinetry? It takes more site labour and finishing time, while factory boxes cost more in shop work and delivery. Bids compare only when both price the same scope: base, scribes, trim, wiring and lighting, paint and the ladder. See How to Read a Builder's Bid.
Can adjustable shelves carry a full load of books? Yes, if span, thickness, edge strip and pins are chosen for that load and checked in a sag calculator.
Can a rolling ladder be added later? Only if there is solid wood at rail height for the brackets. Without a continuous rail or fixed shelf there, and blocking behind it, adding the ladder means rework, so decide before the carcasses are built.
How fitted and modular cabinet furniture differ from the designer's side, DeZZign explains on its Cabinet furniture page and in Wardrobe Systems, Shelf by Shelf. The drawings that show a built-in with every dimension are part of what DeZZign describes in 68 Sheets: What an Interior Design Project Actually Includes.
How LINKS builds a built-in
We work from DeZZign's design, the client's own, or drawings we prepare, and price the wall from those drawings and specifications before work starts: carcasses, shelves, trim, wiring and lighting, paint and the ladder hardware. Materials and hardware are procured on a schedule tied to the stages, so the ladder, drivers and light fittings are chosen and on hand before the wall closes.
Blocking, wiring and backing behind the built-in are photographed and recorded before they are covered. The site is kept clean and the rest of the house protected from dust and overspray. Acceptance is signed only after every item on the punch list is fixed. We build on the Eastside and across the Seattle area, and in Ukraine.
Sources: AWI, AWMAC and WI: Architectural Woodwork Standards, 1st edition (2009), Section 10, Casework; Woodbin: The Sagulator, shelf sag calculator; Quiet Glide: Ladder Installation and Specification Guide; Benjamin Moore: Advance Waterborne Interior Alkyd Matte 791, technical data sheet.